Ingredients
Two 12-ounce bags frozen raspberries
1/2 cup granulated sugar
2 tablespoons flour
1 tablespoon cornstarch
Juice of one lemon
3 cups rolled oats
3 cups flour
2 cups brown sugar packed
1 teaspoon baking powder
1 1/2 cups melted butter
1/2 teaspoon salt
Instructions
1-Getting started: Getting started with Raspberry Crumble Bars is as simple as turning on your oven, and I’ll walk you through each step to make sure you nail it every time. Begin by preheating your oven to 350°F (175°C) and lining a 9×13-inch pan with parchment paper for easy cleanup this is key to avoiding any sticking issues. Once that’s done, focus on preparing the raspberry filling by thoroughly draining the frozen raspberries to get rid of excess liquid, which helps keep the bars from becoming too soggy.
2-Mix the raspberry filling: Now, in a large bowl, mix the drained raspberries with 1/2 cup granulated sugar, 2 tablespoons flour, 1 tablespoon cornstarch, and the juice of one lemon until everything combines into a juicy, thick filling. In another bowl, whip up the crumble mixture by combining 3 cups rolled oats, 3 cups flour, 2 cups packed brown sugar, 1 teaspoon baking powder, 1 1/2 cups melted butter, and 1/2 teaspoon salt stir until it forms a crumbly texture that’s easy to work with.
3-Prepare and bake the base: Press two-thirds of the crumble mixture evenly into your prepared pan to create a solid base, then pop it in the oven for about 10 minutes to set.
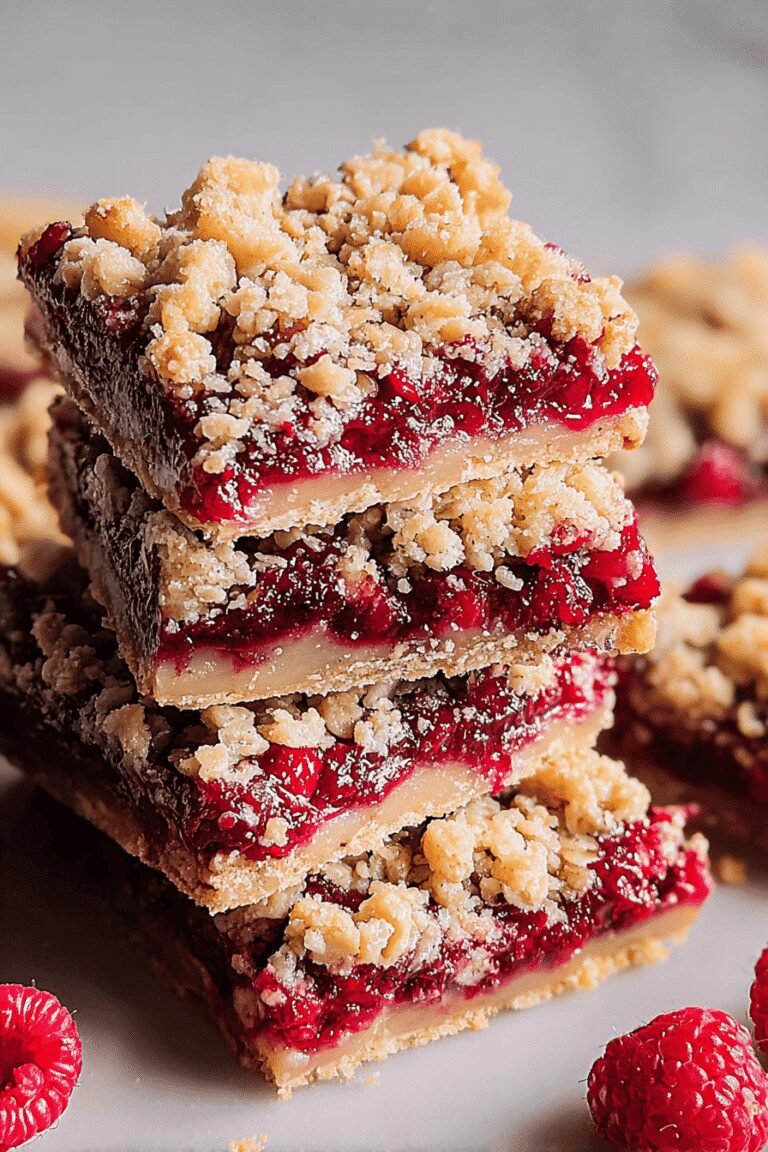
4-Assemble and bake the bars: After that, spread the raspberry filling over this baked base, making sure it’s nice and even, and sprinkle the remaining crumble on top for that irresistible crisp topping. Bake for an additional 25 to 30 minutes until the top turns golden and the raspberries bubble up beautifully the total preparation time is around 1 hour, so it’s a quick project even on weekdays.
5-Chill and serve: To ensure your bars come out perfectly, remember to chill them for several hours after baking so they firm up and slice neatly.
6-Slice and enjoy: After chilling, cut the bars into squares and enjoy the contrast of the tart filling against the buttery crumble it’s a dessert that feels homemade and special.
Last Step:
Please leave a rating and comment letting us know how you liked this recipe! This helps our business to thrive and continue providing free, high-quality recipes for you.Notes
🍽️ Thoroughly drain or thaw raspberries to prevent a watery filling.
❄️ Chill bars post-baking to firm up the filling for cleaner slices.
🍓 Substitute with blueberries or strawberries, or use gluten-free flour with baking powder for a gluten-free option.
- Prep Time: 30 minutes
- Chilling Time: 2 hours
- Cook Time: 30 minutes
- Category: Dessert
- Method: Baking
- Cuisine: American
- Diet: Vegetarian
Nutrition
- Serving Size: 1 bar
- Calories: 250
- Sugar: 18g
- Sodium: 150mg
- Fat: 12g
- Saturated Fat: 7g
- Unsaturated Fat: 4g
- Trans Fat: 0g
- Carbohydrates: 33g
- Fiber: 3g
- Protein: 3g
- Cholesterol: 30mg