Ingredients
– 8 ounces softened cream cheese
– 1/2 cup mayonnaise
– 9-ounce jar of green pimento-stuffed olives, diced
– 1 tablespoon olive brine from the jar of olives
– 1 cup shredded cheddar cheese
– 1/2 teaspoon garlic powder
– 1/4 teaspoon ground black pepper
– Crackers for serving
Instructions
1-Step 1: Prepare Your Ingredients Before you begin mixing, take a few minutes to prepare your ingredients properly. Start by removing the cream cheese from the refrigerator at least 30 minutes before you plan to make the dip. Softened cream cheese blends smoothly with the other ingredients, creating a uniform texture without lumps. If you’re short on time, you can microwave the cream cheese in 15-second intervals, flipping it between each interval until it reaches room temperature. Next, drain the jar of green pimento-stuffed olives, but don’t discard the brine. Reserve one tablespoon of the brine to add to your dip. Dice the olives into small, even pieces. Smaller pieces distribute better throughout the dip, ensuring you get olive flavor in every bite. Set aside a few whole olives for garnish if desired.
2-Step 2: Combine the Base Ingredients In a large mixing bowl, add the softened cream cheese and mayonnaise. Using a hand mixer or a sturdy spoon, blend these two ingredients together until smooth and creamy. The mixture should be free of lumps and have a consistent texture throughout. This step creates the foundation for your dip, so take your time to ensure it’s well combined. If you’re using Greek yogurt as part or all of your mayonnaise substitute, add it at this stage. The yogurt will make the dip slightly tangier and lighter in texture. Keep in mind that the final result will be less rich than the full-fat version, which some people actually prefer.
3-Step 3: Add the Olives and Brine Once your base is smooth, add the diced olives and the reserved tablespoon of olive brine. The brine is a secret weapon in this recipe. It amplifies the olive flavor without requiring additional salt or seasonings. Fold the olives into the cream cheese mixture using a spatula or wooden spoon. Distribute the olive pieces evenly throughout the dip. Take your time with this step to ensure every scoop will have a good balance of olives and creamy base. The pimentos inside the olives add tiny bursts of sweetness that contrast beautifully with the briny olive flavor.
4-Step 4: Incorporate the Cheese and Seasonings Add the shredded cheddar cheese, garlic powder, and ground black pepper to the bowl. Stir everything together until the cheese is evenly distributed and the seasonings are fully incorporated. The garlic powder should blend seamlessly into the mixture, providing subtle savory notes without any raw garlic harshness. Taste your dip at this stage and adjust the seasonings if needed. If you prefer more garlic, add another pinch. If you like things spicy, a dash of cayenne pepper or red pepper flakes can add a welcome kick. Remember that the flavors will develop and intensify as the dip chills, so don’t over-season at this point.
5-Step 5: Chill the Dip Cover the bowl with plastic wrap or transfer the dip to an airtight container. Place it in the refrigerator for at least one hour before serving. This chilling time is essential for two reasons. First, it allows the dip to firm up, making it easier to scoop onto crackers. Second, it gives the flavors time to meld together into a cohesive, delicious whole. The cream cheese needs time to re-set after being mixed, and the olive flavor needs time to permeate the entire dip. While one hour is the minimum, chilling for two to four hours produces even better results. If you’re planning ahead, you can make this dip up to 24 hours in advance.
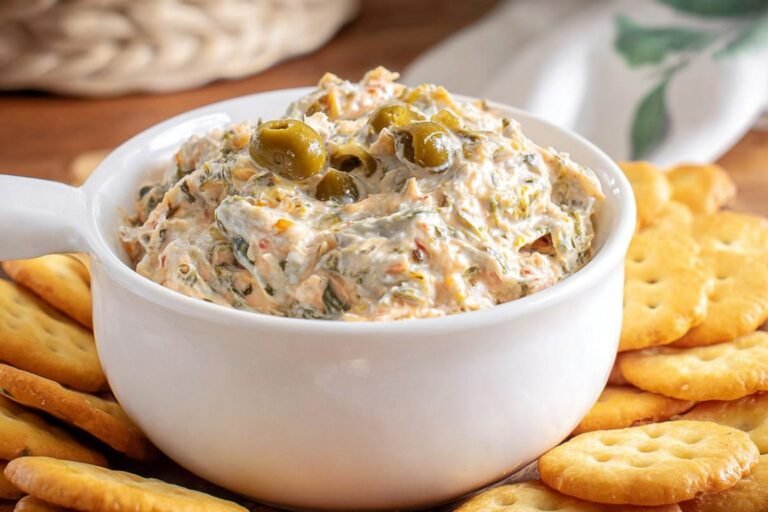
6-Step 6: Garnish and Serve When you’re ready to serve, remove the dip from the refrigerator and give it a quick stir to recombine any ingredients that may have separated slightly. Transfer the dip to a serving bowl if you haven’t already. Garnish the top with a few whole green olives for a pop of color and a visual cue about the main ingredient. Arrange your choice of crackers around the dip on a serving platter. For a more elaborate presentation, add some fresh vegetable sticks like celery, carrot, and bell pepper alongside the crackers. This olive dip recipe also pairs wonderfully with homemade rolls for a heartier appetizer option.
Last Step:
Please leave a rating and comment letting us know how you liked this recipe! This helps our business to thrive and continue providing free, high-quality recipes for you.Notes
⏰ Make ahead up to 24 hours for peak flavor development during chilling.
🔥 Add chopped jalapeños or lemon juice for spicy or tangy variations.
🥛 Swap mayo with Greek yogurt for lighter version without losing creaminess.
- Prep Time: 15 minutes
- Chill: 1 hour
- Category: Appetizer
- Method: No Cook
- Cuisine: American
- Diet: Vegetarian
Nutrition
- Serving Size: 1/4 cup
- Calories: 239 kcal
- Sugar: 1g
- Sodium: 614mg
- Fat: 24g
- Saturated Fat: 9g
- Unsaturated Fat: 14g
- Trans Fat: 0g
- Carbohydrates: 3g
- Fiber: 1g
- Protein: 4g
- Cholesterol: 39mg