Ingredients
– 8 ounces strawberries (washed, stemmed, halved) for base sweetness and classic berry flavor
– 4 ounces blueberries (washed) for depth and natural sweetness to the sauce
– 4 ounces raspberries (washed) for tartness and vibrant color to the mixture
– 3/4 cup granulated sugar for sweetening and helping thicken the sauce
– 3 tablespoons cornstarch for perfect jammy consistency
– 2 cups graham cracker crumbs (about 2 sleeves) for buttery crunchy foundation
– 6 tablespoons unsalted butter (melted) for binding crumbs and adding richness
– 24 ounces cream cheese (full fat, softened to room temperature) for signature tang and creaminess
– 3/4 cup granulated sugar for sweetening the filling to balance tangy cream cheese
– 2 teaspoons vanilla extract for warm aromatic flavor
– Pinch of salt for heightening flavors and balancing sweetness
– 1 cup cold heavy cream (whipped to stiff peaks) for light fluffy texture
– Whipped cream for serving
– Mixed berries for beautiful finishing touch
Instructions
1-Step 1: Create the Homemade Berry Sauce Start by preparing the berry sauce, as it needs time to cool completely before mixing into the filling. Place the strawberries, blueberries, and raspberries in a blender or food processor. Blend until completely smooth, scraping down the sides as needed. The mixture should be a beautiful deep purple-pink color. Pour the puree through a fine-mesh sieve into a medium saucepan, pressing with a spatula to extract all the juice. Discard the seeds and pulp left in the sieve. This straining step ensures your sauce will be silky smooth without any berry seeds. Whisk the granulated sugar and cornstarch into the strained berry puree until no lumps remain. Place the saucepan over medium heat and cook, whisking constantly, until the mixture thickens and becomes jammy. This typically takes 10-15 minutes. You’ll know it’s ready when the sauce coats the back of a spoon and leaves a clear trail when you run your finger through it. Remove from heat and let cool to room temperature. The sauce will continue thickening as it cools. For faster cooling, transfer to a heat-safe bowl and place in the refrigerator for 15-20 minutes.
2-Step 2: Prepare the Graham Cracker Crust While the berry sauce cools, move on to the crust. Line the bottom of a 9-inch springform pan with parchment paper. This prevents sticking and makes serving much easier. Lightly grease the sides with a small amount of butter. In a medium bowl, combine the graham cracker crumbs with the melted butter. Stir until the crumbs are evenly coated the mixture should feel like wet sand that holds its shape when squeezed. If it feels too dry, add another tablespoon of melted butter. Too wet, and your crust won’t hold together properly. Transfer the crumb mixture to the prepared springform pan. Using the back of a measuring cup or the bottom of a glass, press the crumbs firmly into an even layer across the bottom and about 1 inch up the sides. The key here is pressing firmly a loose crust will crumble when sliced. Place the pan in the freezer for at least 15 minutes while you prepare the filling. This chilling step helps the crust hold its shape when you add the filling. If you’re short on time, a 10-minute freeze will work in a pinch.
3-Step 3: Make the Creamy Filling Now comes the most important part creating that perfectly light and creamy filling. In a large mixing bowl, beat the softened cream cheese, sugar, vanilla extract, and salt using an electric mixer on medium speed. Beat until completely smooth and creamy, scraping down the sides and bottom of the bowl halfway through. This usually takes 2-3 minutes. Any lumps in the cream cheese at this stage will remain in the finished cheesecake. In a separate clean bowl, pour the cold heavy cream. Using an electric mixer with clean beaters or a whisk attachment, whip the cream on medium-high speed until stiff peaks form. This means when you lift the beaters, the cream stands up in firm peaks that don’t fall over. Be careful not to overwhip, or the cream will become grainy and start separating into butter. Once the berry sauce has cooled to room temperature, whisk about half of it into the cream cheese mixture. This creates the beautiful berry swirl throughout the filling. Save the remaining sauce for swirling on top or serving alongside. Using a rubber spatula, gently fold the whipped cream into the cream cheese mixture. Work in three additions, folding from the bottom of the bowl up and over the top. This motion preserves the air you whipped into the cream, keeping the filling light rather than dense. Stop folding as soon as no white streaks remain overmixing will deflate the filling.
4-Step 4: Assemble and Chill Remove the crust from the freezer and pour the filling into the center. Using an offset spatula, spread the filling evenly to the edges, smoothing the top. The offset spatula’s angled blade makes this job much easier and gives you a professional-looking finish. If you have remaining berry sauce, you can drizzle it over the top and use a skewer to create a decorative swirl pattern. Cover the pan with plastic wrap or aluminum foil, pressing it gently so it doesn’t touch the surface of the cheesecake. Refrigerate for at least 6-8 hours, or preferably overnight. The cheesecake needs this time to set properly and for the flavors to develop. Resist the urge to check on it opening the refrigerator repeatedly can slow the setting process.
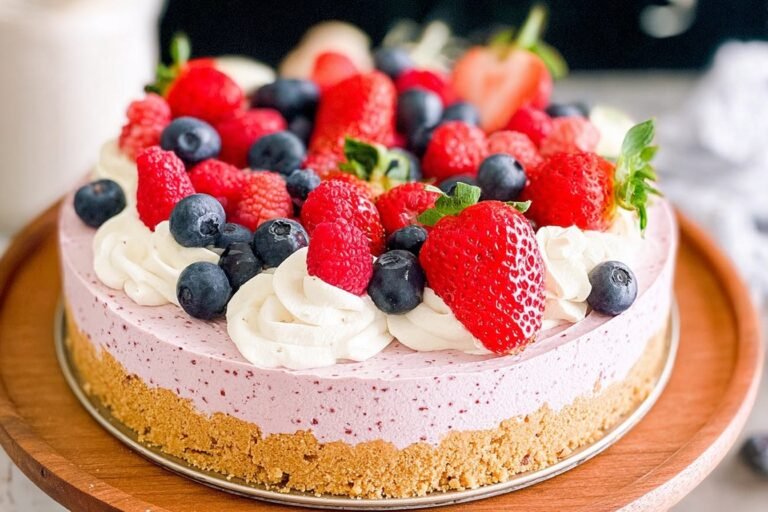
5-Step 5: Serve and Enjoy When ready to serve, run a thin knife around the edge of the cheesecake to loosen it from the pan. Release the springform ring and carefully transfer the cheesecake to a serving plate. Remove the parchment paper from the bottom if desired. Top with fresh whipped cream and mixed berries for garnish, if using. Slice with a clean, sharp knife, wiping the blade between cuts for the cleanest slices. Serve immediately while cold for the best texture and flavor.
Last Step:
Please leave a rating and comment letting us know how you liked this recipe! This helps our business to thrive and continue providing free, high-quality recipes for you.Notes
🧀 Full-fat brick cream cheese only—best creamy texture.
❄️ Freeze crust first—sets firm base instantly.
🕐 Chill 6+ hours minimum; stores fridge 5 days.
- Prep Time: 20 minutes
- Chill: 8 hours
- Cook Time: 15 minutes
- Category: Dessert
- Method: No Bake
- Cuisine: American
- Diet: Vegetarian
Nutrition
- Serving Size: 1 slice
- Calories: 498 kcal
- Sugar: 33g
- Sodium: 277mg
- Fat: 34g
- Saturated Fat: 20g
- Unsaturated Fat: 11g
- Trans Fat: 0.2g
- Carbohydrates: 45g
- Fiber: 2g
- Protein: 5g
- Cholesterol: 95mg