Ingredients
– 1 1/2 cups graham cracker crumbs
– 1/3 cup sugar
– 6 tablespoons butter, melted
– 2 14-ounce cans sweetened condensed milk
– 4 ounces cream cheese, softened
– 3/4 cup fresh key lime juice or bottled key lime juice
– Zest of 2 regular limes or 4 key limes
– Fresh whipped cream
Instructions
1-Step One: Prepare Your Equipment and Oven Start by preheating your oven to 350 degrees Fahrenheit. This temperature is ideal for baking the crust and setting the filling without causing cracks or over-browning. While the oven heats, prepare your 8-inch square baking pan by lining it with parchment paper or aluminum foil. Leave some overhang on the sides to create handles this makes removing the bars for clean cutting much easier later. Gather all your ingredients and measure them out before beginning. Having everything ready (a technique called mise en place) prevents mistakes and makes the process smoother. Your cream cheese should be softened to room temperature, which typically takes about 30 minutes on the counter.
2-Step Two: Make the Graham Cracker Crust In a medium bowl, combine the graham cracker crumbs, sugar, and melted butter. Mix thoroughly until all the crumbs are evenly coated with butter and the mixture resembles wet sand. You should be able to press a handful together and have it hold its shape. Transfer the mixture to your prepared pan and press it firmly and evenly across the bottom. Use the bottom of a measuring cup or a flat-bottomed glass to create a compact, even layer. The tighter you pack the crust, the better it will hold together when cutting the bars later.
3-Step Three: Bake the Crust Place the pan in your preheated oven and bake the crust for 10 minutes. This brief baking sets the crust and gives it a subtle toasted flavor. You’ll notice the edges turning slightly golden and the crust becoming fragrant. After removing the crust from the oven, allow it to cool completely before adding the filling. This typically takes 20 to 30 minutes at room temperature. A hot crust would cook the filling prematurely and potentially cause separation, so patience at this stage is important.
4-Step Four: Prepare the Key Lime Filling While the crust cools, make the filling. Place the softened cream cheese in a large mixing bowl and beat it with an electric mixer until completely smooth. This usually takes about 1 minute on medium speed. Any lumps at this stage will show in the final product, so take time to scrape the bowl and ensure smoothness. Add both cans of sweetened condensed milk to the cream cheese and mix until well combined. The mixture should be smooth and creamy with no visible cream cheese streaks. Next, pour in the key lime juice and add the lime zest. Mix on medium speed for 2 to 3 minutes until the filling is uniform and slightly thickened. The acid in the lime juice will begin reacting with the sweetened condensed milk, creating a thicker consistency. This natural thickening is what gives key lime pie its characteristic texture without requiring eggs or additional thickeners.
5-Step Five: Assemble and Bake Pour the filling over your cooled crust, using a spatula to spread it evenly to all corners. Give the pan a gentle tap on the counter to release any air bubbles and create a smooth surface. Return the pan to the 350-degree oven and bake for 10 minutes. This brief baking time sets the edges while keeping the center slightly jiggly it will continue firming up as it cools. Over-baking can cause cracks, so resist the urge to bake until completely set.
6-Step Six: Cool and Chill Remove the pan from the oven and let it cool at room temperature for about 30 minutes. During this time, the filling will begin setting and the pan will reach a temperature safe for refrigeration. After the initial cooling, place the pan in the refrigerator for at least 3 hours, though overnight chilling produces the cleanest slices. The bars need this time to fully set and develop their signature creamy-firm texture.
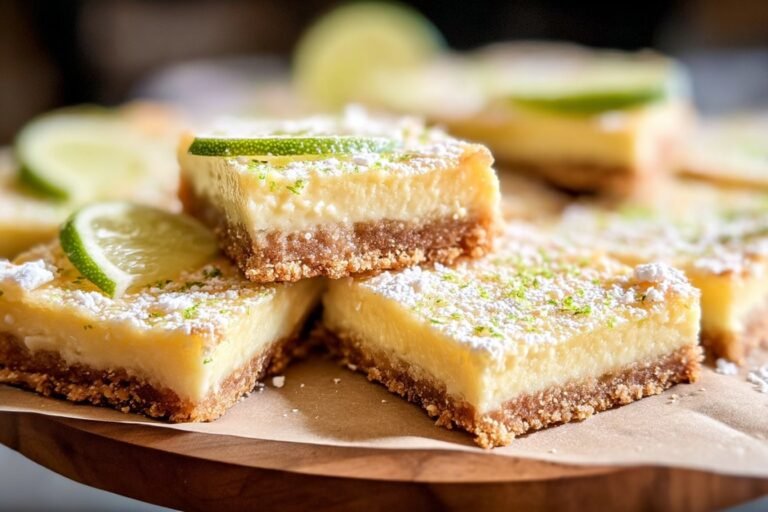
7-Step Seven: Slice and Serve Once thoroughly chilled, lift the bars from the pan using the parchment or foil handles. Place the block on a cutting board and use a sharp knife to cut into squares. Wiping the knife clean between cuts ensures neat, professional-looking edges. Top each bar with a dollop of fresh whipped cream and a small sprinkle of lime zest if desired. Serve cold for the best flavor and texture experience.
Last Step:
Please leave a rating and comment letting us know how you liked this recipe! This helps our business to thrive and continue providing free, high-quality recipes for you.Notes
🍈 Use bottled key lime juice for convenience, or fresh for brighter flavor.
❄️ Prepare the crust several days ahead and store at room temperature until ready to fill.
🧊 Chill bars thoroughly for the perfect firm texture, and freeze extras up to 3 months.
- Prep Time: 1 hour 15 minutes
- Chill: 3 hours
- Cook Time: 15 minutes
- Category: Dessert
- Method: Baked
- Cuisine: American
- Diet: Vegetarian
Nutrition
- Serving Size: 1 bar
- Calories: 153 kcal
- Sugar: 9g
- Sodium: 144mg
- Fat: 10g
- Saturated Fat: 6g
- Unsaturated Fat: 3.4g
- Trans Fat: 0.2g
- Carbohydrates: 15g
- Fiber: 0.4g
- Protein: 1g
- Cholesterol: 25mg