Ingredients
– 1 cup (240g/ml) cold heavy cream or heavy whipping cream
– 2 tablespoons granulated sugar or confectioners’ sugar
– 1/2 teaspoon pure vanilla extract or vanilla bean paste
Instructions
1-First Step: Chill Your Equipment Before you begin, place your mixing bowl and whisk attachment in the refrigerator for 30 minutes or the freezer for 15 minutes. Cold equipment helps the cream whip faster and achieve greater volume. This step is particularly important in warm kitchens or during summer months. Glass and metal bowls work best because they retain cold temperatures effectively. While your equipment chills, gather all your ingredients. Measure out the heavy cream, sugar, and vanilla so everything is ready to go. Having pre-measured ingredients prevents you from scrambling mid-process, which could lead to over-whipping while you search for items.
2-Second Step: Combine Ingredients Pour 1 cup of cold heavy cream into your chilled mixing bowl. Add 2 tablespoons of sugar and 1/2 teaspoon of vanilla extract right at the start. Some bakers prefer adding sugar gradually, but mixing it in initially works just fine and saves time. The sugar actually helps stabilize the foam structure as it forms. Use an electric mixer or stand mixer fitted with a whisk attachment. Hand mixers work perfectly well for small batches, while stand mixers are ideal when you’re making larger quantities or need your hands free for other preparation tasks.
3-Third Step: Whip at Medium-High Speed Start your mixer on medium speed to prevent splashing, then increase to medium-high speed. The cream will progress through several stages as air incorporates into the fat structure. Watch carefully and check frequently after the first two minutes. Timing matters: Most mixers achieve medium peaks in 3 to 4 minutes, but this varies based on your mixer’s power, bowl temperature, and cream temperature. Check every 30 seconds once you see soft peaks forming.
4-Fourth Step: Recognize Peak Stages Understanding the different peak stages helps you stop at exactly the right moment:
| Peak Type | Description | Best Used For |
|---|---|---|
| Soft Peaks | Peaks form but immediately flop over when beaters are lifted | Folding into mousses, topping warm drinks |
| Medium Peaks | Peaks hold shape with tips that curl over slightly | Dolloping on pies, cakes, fruit |
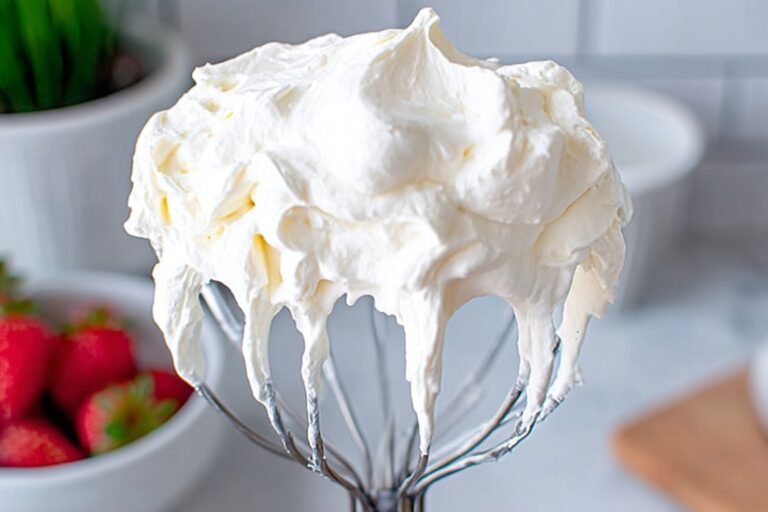
| Stiff Peaks | Peaks stand straight up without drooping | Piping decorations, layering between cake |
For most applications, medium peaks are ideal. The whipped cream holds a semi-sturdy peak that slightly droops but maintains its shape beautifully. This consistency spreads easily and looks gorgeous dolloped onto desserts.
5-Fifth Step: Stop Before Over-Whipping The difference between perfectly whipped cream and curdled grainy mess happens quickly. Over-whipping causes the fat globules to clump together, pushing out liquid and creating a separated, butter-like texture. Pay close attention once you reach the soft peak stage. If you accidentally over-whip, don’t panic. Add a tablespoon or two of fresh cold heavy cream and gently fold it in by hand using a spatula. This smooths out the texture and brings it back to a creamy consistency. However, if you’ve whipped it into actual butter, you’ll need to start over with fresh cream.
6-Sixth Step: Serve or Store Properly Use your whipped cream immediately for best results, or cover tightly and refrigerate for up to 24 hours. When storing, place plastic wrap directly against the surface to prevent a skin from forming. Glass or plastic containers with tight-fitting lids work best for storage.
Last Step:
Please leave a rating and comment letting us know how you liked this recipe! This helps our business to thrive and continue providing free, high-quality recipes for you.Notes
❄️ Chill bowl/whisk first—doubles volume faster.
🍬 Powdered sugar dissolves best for no-grit texture.
⏹️ Medium peaks only—overwhip adds cream to fix.
- Prep Time: 5 minutes
- Category: Dessert
- Method: No Cook
- Cuisine: American
- Diet: Vegetarian
Nutrition
- Serving Size: 2 tablespoons
- Calories: 100 kcal
- Sugar: 3g
- Sodium: 10mg
- Fat: 10g
- Saturated Fat: 6g
- Unsaturated Fat: 4g
- Trans Fat: 0g
- Carbohydrates: 3g
- Fiber: 0g
- Protein: 1g
- Cholesterol: 30mg