Ingredients
– 1 cup whole milk, warmed to about 110°F (43°C)
– 2 1/4 teaspoons instant yeast (1 standard packet)
– 2 tablespoons granulated sugar, divided
– 1 large egg
– 1/4 cup unsalted butter, room temperature and cut into 4 pieces
– 1 teaspoon salt
– 3 cups all-purpose flour or bread flour
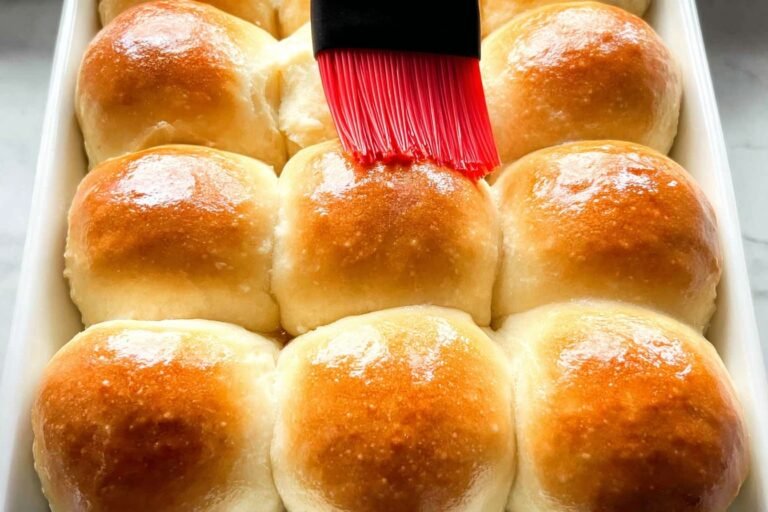
– 2 tablespoons melted unsalted butter mixed with 1 tablespoon honey
Instructions
1-First Step: Prepare Your Ingredients and Workspace Start by gathering all your ingredients and measuring them accurately. Bread baking is more precise than other types of cooking, so proper measuring matters. Warm your milk to approximately 110°F (43°C) this temperature is warm enough to activate the yeast without killing it. If you don’t have a thermometer, the milk should feel comfortably warm on your wrist, not hot. Cut your butter into 4 pieces and let it come to room temperature along with your egg. Cold ingredients can slow down yeast activity and make kneading more difficult. While ingredients warm up, lightly grease a large mixing bowl and a 9×13 inch baking pan with butter or cooking spray.
2-Second Step: Activate the Yeast In a large mixing bowl or the bowl of your stand mixer, combine the warm milk with 1 tablespoon of the sugar and all of the instant yeast. Stir gently to combine, then let the mixture sit for about 5 minutes. Even though instant yeast doesn’t require activation, this step ensures your yeast is alive and working properly you should see some bubbles or foam forming on the surface.
3-Third Step: Mix the Dough Once your yeast mixture shows signs of activity, add the remaining tablespoon of sugar, the room temperature egg, the softened butter pieces, and the salt. Mix with a wooden spoon or your mixer’s paddle attachment on low speed until everything is roughly combined. The butter won’t be fully incorporated yet this is normal. Begin adding the flour, one cup at a time, mixing after each addition. Start with 2 1/2 cups, then assess the dough. It should come together into a shaggy ball that clears the sides of the bowl but still sticks slightly to the bottom. If the dough seems too wet, add more flour in 1/4 cup increments. Different flours absorb different amounts of liquid, so measuring by feel is important.
4-Fourth Step: Knead Until Smooth Switch to a dough hook if using a stand mixer, or turn the dough onto a lightly floured surface for hand kneading. Knead for 5-8 minutes by machine or 8-10 minutes by hand. The dough is ready when it’s smooth, elastic, and passes the windowpane test stretch a small piece thin enough to see light through without tearing. Proper kneading develops gluten, which gives rolls their structure and chew. Under-kneaded dough produces dense, heavy rolls, while over-kneaded dough can become tough. The sweet spot is a dough that springs back when you poke it gently.
5-Fifth Step: First Rise Shape the dough into a smooth ball and place it in your greased mixing bowl, turning once to coat all sides with oil. Cover with a clean kitchen towel or plastic wrap. Place the bowl in a warm, draft-free location inside a turned-off oven with the light on works wonderfully. Let the dough rise for 1-2 hours until doubled in size. Rising time varies based on room temperature and yeast freshness. Don’t rush this step proper rising creates the light, airy texture you want. The dough is ready when an indentation made with your finger remains.
6-Sixth Step: Shape the Rolls Once doubled, gently punch down the dough to release excess air. Turn it onto a lightly floured surface and divide into 12-15 equal pieces. A kitchen scale helps ensure uniform size each piece should weigh about 2 ounces. Shape each piece into a ball by pulling the edges toward the center and rolling on the counter with your palm in a circular motion. This creates surface tension for smooth, round rolls. Place shaped rolls in your prepared 9×13 pan, spacing them about 1 inch apart.
7-Seventh Step: Second Rise Cover the pan with a clean towel and let the shaped rolls rise for another 45-60 minutes until puffy and nearly doubled. They should be touching each other and fill the pan. This second rise, called proofing, creates the final texture. Under-proofed rolls will be dense; over-proofed rolls may collapse during baking.
8-Final Step: Bake and Finish Preheat your oven to 350°F (175°C) while the rolls complete their second rise. Once puffy, bake the rolls for 20-25 minutes until golden brown on top. The internal temperature should reach 190°F (88°C) if you’re using a thermometer. Remove from the oven and immediately brush with the honey-butter mixture if using. This adds flavor and creates that beautiful, shiny finish. Let the rolls cool in the pan for 5-10 minutes before serving warm. These rolls taste best fresh but keep well for several days.
Last Step:
Please leave a rating and comment letting us know how you liked this recipe! This helps our business to thrive and continue providing free, high-quality recipes for you.Notes
🥛 Make sure milk is around 110°F – too hot kills yeast, too cold slows activation.
🍞 For extra softness, use bread flour and knead thoroughly until dough is smooth.
⏰ Rise dough in a warm, draft-free spot like near a sunny window or in an off oven with light on.
- Prep Time: 20 minutes
- Rising Time: 1 hour 45 minutes
- Cook Time: 15 minutes
- Category: Bread
- Method: Baking
- Cuisine: American
- Diet: Vegetarian
Nutrition
- Serving Size: 1 roll
- Calories: 180 kcal
- Sugar: 4g
- Sodium: 220mg
- Fat: 6g
- Saturated Fat: 3g
- Unsaturated Fat: 2.5g
- Trans Fat: 0g
- Carbohydrates: 28g
- Fiber: 1g
- Protein: 4g
- Cholesterol: 25mg