Ingredients
– 3 cups mini marshmallows
– ½ cup whole milk
– 1 ½ cups heavy cream
– 1 ½ cups graham cracker crumbs
– ½ cup melted butter
– ½ cup creamy peanut butter (melted)
Instructions
1-Step 1: Prepare Your Marshmallow Base Start by combining 3 cups of mini marshmallows (or 24 regular-sized marshmallows) with ½ cup of whole milk in a medium saucepan. Place the saucepan over low heat this is crucial because high heat can cause the marshmallows to scorch or become stringy. Stir the mixture constantly with a wooden spoon or silicone spatula, making sure to scrape the sides and bottom of the pan. Continue stirring for about 3-5 minutes until the marshmallows are completely melted and the mixture is smooth and combined with the milk. You should have a glossy, uniform liquid with no lumps remaining.
2-Step 2: Cool the Marshmallow Mixture Remove the saucepan from heat and let the marshmallow mixture cool for approximately 30 minutes. This cooling period is essential if you add whipped cream to a hot mixture, it will deflate and lose its airy texture. The mixture should reach room temperature or slightly warm, but not hot. Stir occasionally during cooling to prevent a skin from forming on top. You’ll know it’s ready when you can comfortably touch the side of the pan and the mixture has thickened slightly.
3-Step 3: Whip the Heavy Cream While the marshmallow mixture cools, pour 1 ½ cups of heavy cream into a chilled mixing bowl. Using an electric mixer or stand mixer fitted with the whisk attachment, begin whipping on medium speed. Gradually increase to high speed and continue whipping until soft peaks form. Soft peaks means when you lift the whisk, the cream should hold its shape but the tips should gently curl over this typically takes 2-3 minutes. Be careful not to overwhip, as this can lead to a grainy texture or eventually turn into butter.
4-Step 4: Combine Filling Components Once the marshmallow mixture has cooled sufficiently, it’s time to combine everything. Take about one-third of your whipped cream and gently fold it into the marshmallow mixture using a rubber spatula. Use a gentle folding motion cut through the center, scrape along the bottom, and fold over. This initial addition helps lighten the marshmallow base. Then add the remaining whipped cream and continue folding until no white streaks remain. The filling should be uniform in color with a light, fluffy texture. Work efficiently but gently to maintain as much air as possible in the mixture.
5-Step 5: Prepare the Graham Cracker Crust In a medium bowl, combine 1 ½ cups of graham cracker crumbs with ½ cup of melted butter. Mix thoroughly until all the crumbs are evenly coated with butter the mixture should resemble wet sand and hold together when pressed. Press this mixture firmly into the bottom and up the sides of a 9-inch deep pie pan. Use the back of a spoon or the bottom of a measuring cup to create an even, compact layer. Make sure the crust extends about halfway up the sides of the pan for the best structural integrity.
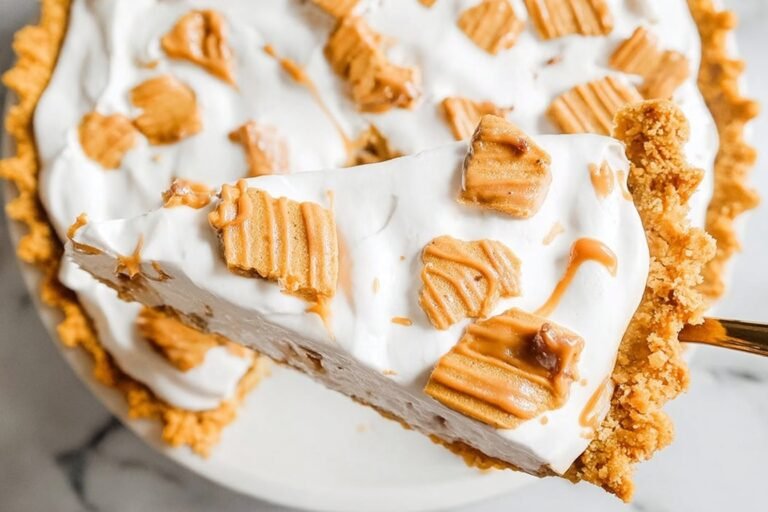
6-Step 6: Assemble Your Pie Spoon the fluffy marshmallow filling evenly over your prepared graham cracker crust. Use your spatula to spread it into an even layer, making sure it reaches all edges of the crust. The filling should fill the pie pan to just below the rim of the crust.
7-Step 7: Add the Peanut Butter Topping Melt ½ cup of creamy peanut butter in the microwave in 15-20 second intervals, stirring between each interval until smooth and pourable. You can also melt it in a small saucepan over very low heat. Once melted, drizzle or spread the peanut butter evenly over the top of the filling. For a drizzled look, use a spoon to create decorative patterns. For a smooth top, spread it gently with an offset spatula. Work quickly as the peanut butter will begin to set as it cools.
8-Step 8: Chill and Set Place your assembled fluffernutter pie in the refrigerator for at least 2 hours, though overnight chilling yields the best results. The pie needs this time for the filling to set properly and for flavors to meld together. Once set, the filling should hold its shape when sliced. Serve chilled for the best texture and flavor experience.
Last Step:
Please leave a rating and comment letting us know how you liked this recipe! This helps our business to thrive and continue providing free, high-quality recipes for you.Notes
🥛 Use whole milk for creamiest filling; 2% works but is slightly less rich.
🛡️ Ensure marshmallows cool fully before folding into whipped cream to avoid deflating.
❄️ Store covered in fridge up to 4 days; portion into ramekins for individual servings.
- Prep Time: 15 minutes
- Chill: 2 hours
- Category: Dessert
- Method: No Bake
- Cuisine: American
- Diet: Vegetarian
Nutrition
- Serving Size: 1 slice
- Calories: 485 kcal
- Sugar: 30g
- Sodium: 350mg
- Fat: 32g
- Saturated Fat: 16g
- Unsaturated Fat: 14g
- Trans Fat: 0g
- Carbohydrates: 45g
- Fiber: 1g
- Protein: 5g
- Cholesterol: 65mg