

Easy Pumpkin Pie Twists
I have to tell you, the first time I made these easy pumpkin pie twists, I was genuinely surprised by how little effort they took.
My kitchen smelled like a cozy autumn bakery in under twenty minutes, and my family practically hovered around the oven waiting for them to finish.
We are talking about a dessert that starts with a simple tube of refrigerated crescent roll dough, a thin layer of spiced pumpkin filling, and a final toss in cinnamon sugar that makes every bite taste like a miniature pumpkin pie.
The real trick is keeping that pumpkin layer light and even. If you pile the filling on too thick, the strips get heavy and sticky, and you lose that beautiful spiral shape.
A thin spread gives you that perfect swirl of pumpkin peeking through the golden dough, and it holds together so well when you twist.

The source I learned from points out that this thin layer is exactly what keeps the filling from oozing out while you shape them. That little detail made the whole process feel waaaaaay easier than I expected.
When the twists come out of the oven, they are crisp on the outside and soft inside, with that unmistakable warm spice aroma that just screams fall.
We love piling them on a big plate with a bowl of whipped cream right in the center for dipping.
It is such a simple, festive treat for Halloween gatherings, Thanksgiving dessert tables, or just a quiet Saturday afternoon when you want something sweet without a complicated baking project.
Jump To
Why These Pumpkin Pie Twists Are Easy
I promise, you can do this. Even if you have never twisted dough before, these pumpkin pie twists are about as forgiving as it gets. The refrigerated crescent dough is already perfectly rolled and ready to go the moment you peel open the tube.
There is no measuring flour, no waiting for yeast to rise, and no tricky rolling pin work. You just unroll it, cut it into two matching rectangles, and you are halfway there.
The filling is equally straightforward. In a small bowl, you stir together pumpkin puree, brown sugar, maple syrup, and pumpkin pie spice. That is it.
Four ingredients, one bowl, and a spoon. The brown sugar melts into the pumpkin and creates this silky, creamy mixture that spreads like a dream.
The maple syrup adds a subtle depth that plain sugar just cannot match, and the pumpkin pie spice brings that classic autumn warmth.
The biggest source of stress with filled pastries is usually the filling squishing out the sides, but this recipe avoids that completely. Because the pumpkin layer is spread thin, the strips stay flexible and cooperative.
You pick up one end, give it a couple of twists, then grab the other end and twist a bit more. The dough holds its shape and the filling stays neatly tucked inside. It is honestly kind of satisfying to watch the spirals form.
The source describes this as a quick fall dessert that can be prepared in less than twenty minutes, and I can confirm that is completely accurate.
From the moment I preheated my oven to the moment I pulled out a tray of golden, fragrant twists, the clock barely moved past the twenty minute mark.
That makes these twists perfect for last minute entertaining or those evenings when you suddenly crave something warm and spiced but do not want to commit to a full pie.
Another thing I love is how versatile the twists are once baked. You can serve them plain, which is already delicious with that crackly cinnamon sugar coating, or you can set out little bowls of whipped cream, caramel sauce, or even a simple vanilla glaze for dipping.
My kids, who usually side eye anything with pumpkin in it, devour these without a single complaint. I think the twist shape tricks them into thinking it is a fun snack rather than a pumpkin dessert.
Cleanup is also a breeze. A cutting board, a small mixing bowl, a pastry brush, and a baking sheet lined with parchment paper are pretty much all you need.
The parchment means nothing sticks, and you can slide the baked twists right onto a cooling rack without any scrubbing later. For busy parents and weeknight bakers, that is a huge win.
Ingredients
Let me walk you through what you will need. These ingredients are simple, and most of them are probably already sitting in your pantry or fridge right now. The full list comes directly from the canonical recipe, and I am keeping it exactly as written so you get the same reliable results every time.
- 1 tube refrigerated crescent roll dough
- 1/2 cup pumpkin puree
- 1/4 cup brown sugar
- 1 tablespoon maple syrup
- 1 teaspoon pumpkin pie spice
- 2 tablespoons melted butter
- 1 tablespoon sugar
- 1/2 teaspoon cinnamon
- Whipped cream for dipping (optional)
The refrigerated crescent roll dough is the backbone of this recipe. I usually grab a standard 8 ounce tube, and the brand I see most often is Pillsbury, but any similar refrigerated crescent dough will work.
Just make sure it is the kind that comes in a solid sheet you can unroll, not the pre cut triangle style, since we need two full rectangles to sandwich the filling.
Pumpkin puree is not the same as pumpkin pie filling. You want the plain, unsweetened, unspiced puree that contains nothing but pumpkin. A half cup is just the right amount to cover one rectangle in a thin, even layer without overwhelming the dough.
If you have leftover pumpkin after making these twists, you can freeze it in small portions for your next batch.
Brown sugar and maple syrup team up to sweeten and flavor the filling. The brown sugar brings a molasses richness, while the maple syrup adds a smooth, almost caramel like note. Together, they balance the earthy pumpkin and warm spice perfectly.
Pumpkin pie spice is that classic blend of cinnamon, ginger, nutmeg, allspice, and sometimes cloves. If you do not have a jar of the pre mixed spice, you can quickly stir together a homemade version, but the pre mixed kind is so convenient and consistent.
Melted butter brushed over the twists before baking helps the cinnamon sugar stick and adds a golden, buttery sheen. The sugar and cinnamon mixture goes on last, creating that irresistible crackly topping that makes these twists taste like a churro met a pumpkin pie.
Assemble and Twist the Dough
Okay, this is the part where we turn a few simple ingredients into those beautiful spiraled twists. I am going to walk you through every step, and I will share the little tips that made my first batch turn out so well.
First, preheat your oven to 375 degrees Fahrenheit and line a baking sheet with parchment paper. The parchment is non negotiable for me because it guarantees the twists will slide right off without any sticking or torn bottoms.

Now, grab a cutting board. Do not work directly on your lined baking sheet for this part. The source highlights this clearly, and I learned why the hard way once.
If you cut the dough strips right on the parchment, you risk slicing through the paper, and then the filling can leak onto the pan and burn. A clean, flat cutting board gives you a stable surface and keeps your parchment intact.
Pop open the tube of crescent dough and unroll it gently onto the cutting board. You will have one large rectangle with a seam down the middle. Use a pizza cutter or a sharp knife to cut along that seam so you have two identical rectangles. Lay them side by side. They should match up in size pretty closely.

In a small bowl, mix together your pumpkin puree, brown sugar, maple syrup, and pumpkin pie spice. Stir until everything is smooth and the brown sugar is fully dissolved. You want a cohesive, spreadable paste, not a lumpy mixture.
Spoon the pumpkin mixture onto one of the dough rectangles. Now, spread it out using the back of your spoon or a small offset spatula. Aim for a thin, even layer that reaches all the way to the edges.

The source emphasizes that a thin layer is the key to keeping the filling from oozing out when you twist.
I found that patience here pays off; take an extra few seconds to get it evenly distributed, and your twists will look neater and bake more uniformly.
Carefully lift the second dough rectangle and place it directly on top of the first one, lining up all the edges as precisely as you can. You now have a pumpkin filled dough sandwich. Gently press down across the surface to help the two layers adhere, but do not squish the filling out the sides.

Now comes the fun part. Using your pizza cutter, slice the dough sandwich into strips. Short, confident cuts work best.
The canonical recipe calls for strips approximately three quarters of an inch wide. I usually aim for about ten to twelve strips total, depending on the exact size of my dough rectangle.

Thinner strips give you more twists, and slightly thicker strips are easier for little hands to help with.
One at a time, transfer each strip to your prepared baking sheet. Leave about an inch of space between them so they have room to puff up slightly.

Here is my favorite twisting technique: pick up one end of a strip and twist it twice in one direction. Then, pick up the other end and twist it two or three more times in the same direction.
The strip will coil into a tight spiral. Twisting from both ends rather than just one gives you a more even twist with less stress on the dough.
The source recommends this method, and I can confirm it makes the process much easier, especially with those delicate, filling filled strips.

If any pumpkin sneaks out during twisting, just tuck it back in with your fingertip or wipe it away. A little bit of exposed filling is totally fine and actually looks pretty once baked.
Keep going until all your strips are twisted and nestled on the baking sheet. At this point, your kitchen already smells like pumpkin spice, and the hard part is officially over. Give yourself a little high five.
Cinnamon Sugar Finish, Baking and Serving
Your twists are all lined up and looking gorgeous. Now we give them the final touch that takes them from good to absolutely irresistible.
Melt your butter in a small dish. Using a pastry brush, generously coat the top of each twist with the melted butter. Do not be shy here; the butter helps the cinnamon sugar cling and promotes that deep golden browning in the oven. Plus, it adds a rich, buttery flavor that complements the spiced pumpkin beautifully.
In a separate little bowl, mix together the tablespoon of sugar and the half teaspoon of cinnamon. Take a pinch at a time and sprinkle it evenly over all the twists. The butter will catch the cinnamon sugar and hold it in place. Try to cover each twist from end to end so every bite gets that sweet, crackly coating.
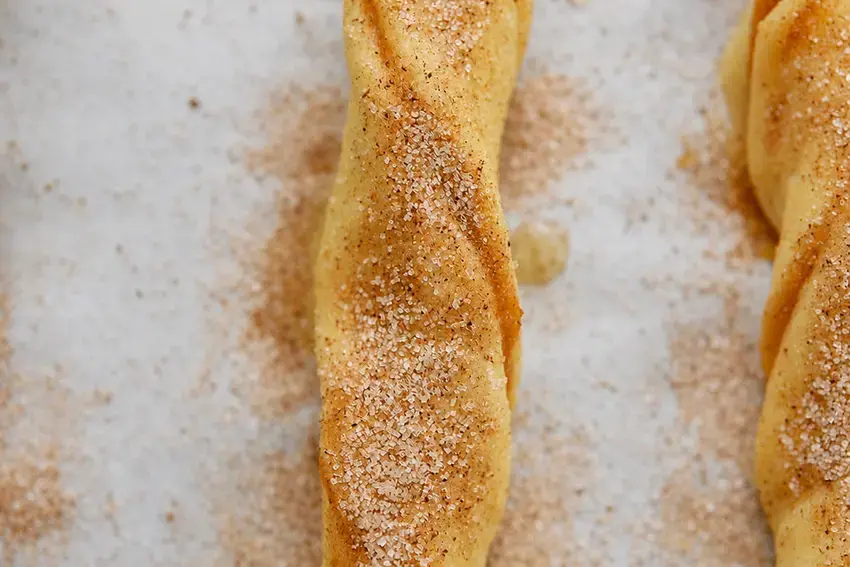
Slide the baking sheet into your preheated 375 degree oven. The canonical bake time is 8 to 11 minutes, and I have found that 10 minutes is the sweet spot in my oven. You are looking for a light golden brown color.
The dough will puff up slightly, and the edges will turn crisp and flaky. Keep an eye on them starting around the 8 minute mark because crescent dough can go from perfectly golden to too dark pretty quickly.
When the timer goes off, pull the sheet out and let the twists rest for just a minute or two. They will be hot and a little soft right out of the oven but will firm up as they cool.
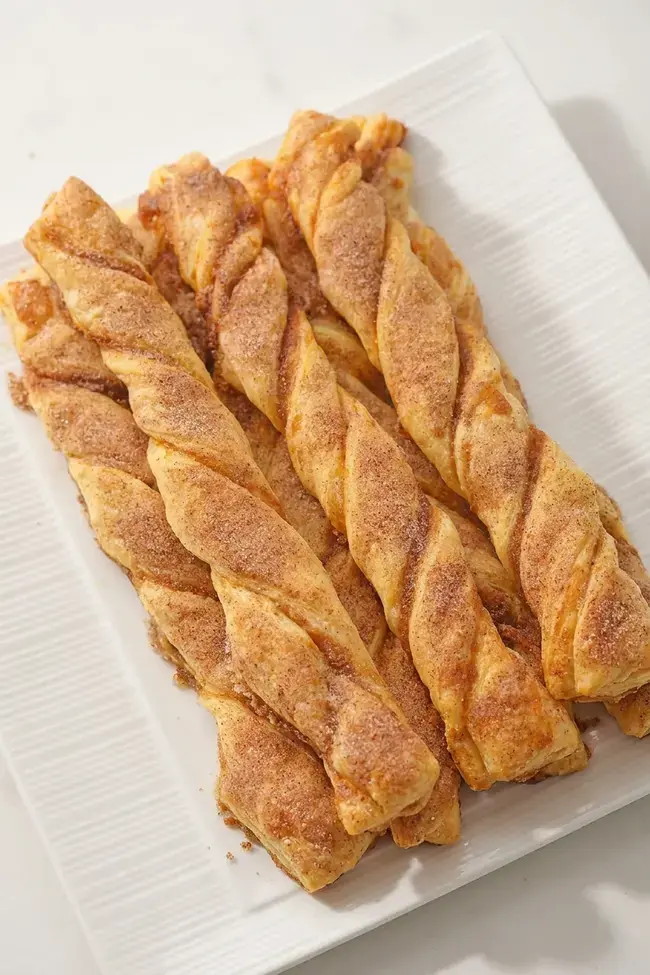
I like to transfer them to a wire rack so the bottoms stay crisp, but you can absolutely serve them straight from the baking sheet if you are in a hurry.
Now for the best part: serving. A big bowl of whipped cream placed right in the middle of the plate is my go to presentation. Everyone can grab a twist and swirl it through the cream.
The cool, airy whipped cream against the warm, spiced pastry is pure magic. You can also drizzle a simple icing made from powdered sugar and a splash of milk over the top if you want an extra layer of sweetness.
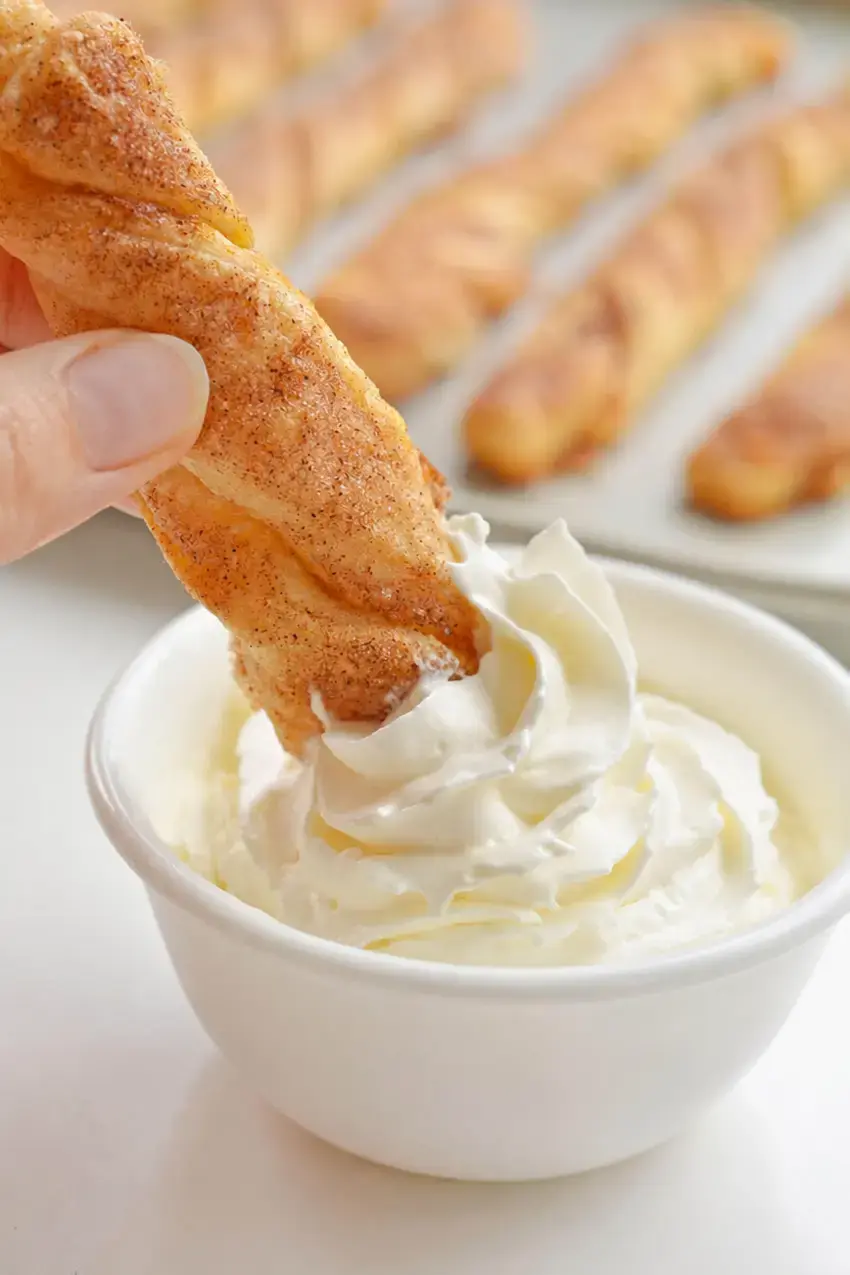
Both options are delicious, and I usually let my family vote on which one they prefer.
These twists are at their absolute best served warm, right after baking. If you happen to have leftovers, store them in an airtight container at room temperature for a day or two.
Pop them in a toaster oven or a warm oven for a few minutes to re crisp them before serving. Honestly, though, leftovers are rare in my house. They disappear faster than I can make them.
FAQs
How do you make pumpkin pie twists with crescent rolls?
Preheat your oven to 375°F and line a baking sheet with parchment paper. Mix 1/2 cup pumpkin puree with 1/4 cup brown sugar, 1 tablespoon maple syrup, and 1 teaspoon pumpkin spice. Spread this mixture over one rectangle of crescent roll dough, top with another rectangle, cut into 3/4-inch strips, and twist each strip. Brush with 2 tablespoons melted butter, sprinkle with 1 tablespoon sugar mixed with 1/2 teaspoon cinnamon, and bake for 8 to 11 minutes until golden brown.
What is the best pumpkin puree to use for pumpkin pie twists?
Use plain pumpkin puree, not pumpkin pie filling, for pumpkin pie twists. Pumpkin puree is simply cooked and mashed pumpkin with no added sweeteners or spices, giving you full control over the flavor. Canned pumpkin puree from any major brand works perfectly and is convenient, or you can use homemade puree if available. Avoid pumpkin pie filling because it is pre-sweetened and spiced, which can make the twists overly sweet and affect the texture.
How do you keep pumpkin pie twists from getting soggy?
Spread the pumpkin filling in a thin, even layer over the crescent dough to prevent sogginess. A thick layer of filling will release too much moisture during baking and make the twists soft. Baking at 375°F for the full 8 to 11 minutes until golden brown ensures the pastry crisps up properly. Enjoy the twists the same day they are baked for the best texture, as leftover twists may lose crispness overnight.
Can you make pumpkin pie twists ahead of time?
Pumpkin pie twists are best enjoyed the day they are made because the crescent dough can lose its crispness over time. If you need to prepare them ahead, you can assemble the unbaked twists, cover them, and refrigerate for a few hours before baking. For leftovers, store them in an airtight container at room temperature and refresh them in a 300°F oven or toaster oven for a few minutes to restore some crunch.

Easy Pumpkin Pie Twists
Easy Pumpkin Pie Twists I have to tell you, the first time I made these easy pumpkin pie twists, I was genuinely surprised by how little effort they took. My kitchen smelled like a cozy autumn bakery in under twenty minutes, and my family practically hovered around the oven waiting for them to finish.
- Total Time: 20 min
- Yield: 10 12 1x
Ingredients
1 tube refrigerated crescent roll dough
1/2 cup Pumpkin puree
1/4 cup Brown sugar
1 Tablespoon maple syrup
1 teaspoon pumpkin spice
2 Tablespoons Melted butter, melted
1 Tablespoon Sugar
1/2 teaspoon Cinnamon
whipped cream for dipping
Instructions
1-Preheat the oven to 375F: Preheat the oven to 375F. Line a baking sheet with parchment paper.
2-In a small bowl, mix together the: In a small bowl, mix together the pumpkin puree, brown sugar, maple syrup and pumpkin spice.
3-Unroll crescent dough on a cutting board: Unroll crescent dough on a cutting board. Cut the dough in half so you have two identical rectangles and lay them beside each other.
4-Evenly spread the pumpkin mixture over one: Evenly spread the pumpkin mixture over one of the rectangles of dough.
5-Place the second rectangle of dough on: Place the second rectangle of dough on top of the first rectangle of dough (so the pumpkin mixture is sandwiched between them). Make sure you line up all the edges.
6-Use a pizza cutter to cut the: Use a pizza cutter to cut the dough into strips approximately 3/4 inch wide.
7-Transfer the strips to the parchment lined: Transfer the strips to the parchment lined baking sheet.
8-Twist each strip by picking up one: Twist each strip by picking up one end and twisting it twice, then picking up the other end and twisting it another 2 or 3 times.
9-Brush melted butter generously over each twist: Brush melted butter generously over each twist.
10-Mix together the sugar and cinnamon then: Mix together the sugar and cinnamon then sprinkle evenly over each twist.
11-Bake at 375F for 8-11 minutes until: Bake at 375F for 8-11 minutes until golden brown.
Last Step:
Please leave a rating and comment letting us know how you liked this recipe! This helps our business to thrive and continue providing free, high-quality recipes for you.- Prep Time: 10 min
- Cook Time: 10 min
- Method: bake


