Ingredients
– Ice cream flavors (vanilla, strawberry, rocky road, mint chocolate chip)
– Colored ice cream cones
– Watermelon (for serving base)
– Cotton candy (for Truffula Trees)
– Red licorice candy ropes
– Large marshmallows
– Strawberries and bananas (for themed hats)
– Large maraschino cherries
– Root beer (for floats)
– Gummy worms and gummy bears (toppings)
– Gummy fish candies (for surprise)
– Chocolate and strawberry syrups
– Caramel and strawberry sauces
– Light whipped cream
– Fresh fruit toppings (sliced strawberries and bananas)
Instructions
1-Step 1: Set the Scene with Decorations Transform your party space into a whimsical Seuss world before guests arrive. Decorate with red and white balloons and streamers hung from the ceiling to create that iconic Cat in the Hat striped pattern. The more balloons you use, the more festive your space becomes. Position streamers in alternating red and white rows across doorways and along walls. This simple decoration instantly signals the party theme and gets everyone excited the moment they walk in.
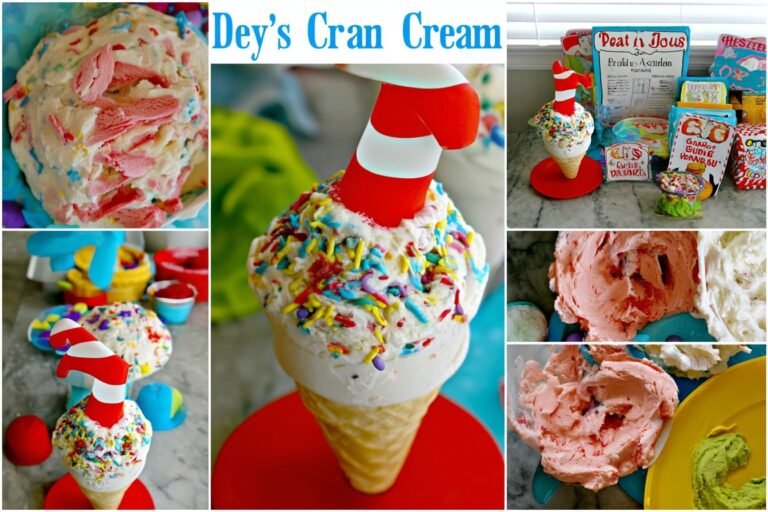
2-Step 2: Create Cat in the Hat Party Hats Paint red plastic cups with white stripes using acrylic craft paint. Allow cups to dry completely before handling. This is a perfect activity to complete a day or two before the party. Arrange these painted cups around your serving area as decorative elements. Kids love wearing them as mini hats, and they double as cute party favors.
3-Step 3: Prepare the Watermelon Serving Tray Hollow out a watermelon to create an eye-catching serving base. Cut the watermelon in half lengthwise and scoop out the flesh using a melon baller or large spoon. Save the melon balls for a healthy snack option. The hollow watermelon becomes a natural bowl that holds your hat topper creations while adding a splash of green to your red and white color scheme.
4-Step 4: Assemble Hat Toppers on Picks Thread large marshmallows onto wooden sandwich picks, alternating with pieces of red licorice candy rope. Create stacks that resemble the Cat’s famous hat with red and white stripes. Insert these finished hat toppers into the hollowed watermelon base. The watermelon holds them upright and creates a stunning centerpiece display.
5-Step 5: Create Fresh Fruit Hat Alternatives For a healthier twist, slice strawberries and bananas into rounds. Thread them alternately onto wooden picks to create red and white striped fruit “hats.” These fresh options look beautiful and taste amazing. Insert the fruit hats alongside the marshmallow versions in the watermelon base. This gives guests choices and accommodates different dietary preferences.
6-Step 6: Prepare Individual Ice Cream Servings Layer strawberry and vanilla ice cream in clear plastic tumblers for a visually striking presentation. The pink and white layers echo the party color scheme and make each serving Instagram-worthy. Work quickly to prevent melting, and place prepared cups back in the freezer until serving time. This step saves time during the party and keeps portions controlled.
7-Step 7: Make Truffula Tree Straws Trim red licorice to fit inside clear straws, threading the candy through each straw. Top each straw with a fluffy tuft of cotton candy to create Truffula Trees inspired by The Lorax. Place these decorative straws in cups or stick them into bowls of ice cream for instant whimsy. Kids absolutely love the colorful, fuzzy tops.
8-Step 8: Set Up the Root Beer Float Station Arrange root beer bottles or a dispenser alongside tubs of vanilla ice cream. Provide clear glasses and long spoons for guests to create their own floats. Post a simple instruction card showing the classic ratio: one scoop of ice cream topped with cold root beer. This interactive station keeps guests engaged and lets everyone customize their drink strength.
9-Step 9: Arrange the Toppings Bar Set out bowls of gummy worms, gummy bears, chocolate syrup, strawberry syrup, caramel sauce, and strawberry sauce. Add light whipped cream and fresh sliced strawberries and bananas. Position large maraschino cherries in a bowl with extra wooden picks nearby. Guests can spear cherries and stack them to mimic “Ten Apples Up on Top” before adding them to their sundaes.
10-Step 10: Hide the “One Fish Two Fish” Surprise Push gummy fish candies into the centers of vanilla ice cream cups before serving. When guests dig in, they discover hidden fish just like in the beloved book. Label these special cups with a small sign reading “One Fish Two Fish Surprise” to build anticipation. This simple touch creates genuine delight and connects the food to the stories.
11-Step 11: Final Touches and Serving Position all ice cream, toppings, and decorations on one central table for easy access. Keep multiple ice cream scoops handy with a cup of warm water for rinsing between flavors. Loosen all wooden picks by inserting and removing them once before the party starts. This ensures easy removal when guests are ready to eat their hat toppers. Your Dr Seuss Ice Cream Party is now ready to delight guests of all ages with themed treats and interactive fun!
Last Step:
Please leave a rating and comment letting us know how you liked this recipe! This helps our business to thrive and continue providing free, high-quality recipes for you.Notes
🍨 Use pre-portioned ice cream cups and multiple scoops with warm water rinse for mess-free serving.
🎨 Prep decorations like painted cups and balloons a day ahead for stress-free party day.
🍒 Insert and remove wooden picks once to loosen before serving to kids.
- Prep Time: 2 hours
- Category: Dessert
- Method: No Cook
- Cuisine: American
- Diet: Vegetarian
Nutrition
- Serving Size: 1 themed sundae
- Calories: 350 kcal
- Sugar: 40g
- Sodium: 100mg
- Fat: 15g
- Saturated Fat: 8g
- Unsaturated Fat: 6g
- Trans Fat: 0g
- Carbohydrates: 50g
- Fiber: 2g
- Protein: 5g
- Cholesterol: 40mg