Ingredients
– 1/4 cup protein powder such as plant-based or whey gives the balls structure and helps build the protein content.
– 1/4 cup coconut flour absorbs moisture and helps the dough hold together.
– 1/4 cup cream cheese such as dairy or vegan adds the cheesecake flavor and creamy texture.
– 2 tablespoons lemon zest brings bright citrus flavor and a fresh aroma.
– 1.5 tablespoons lemon juice adds tang and helps blend the dough.
– 1/4 cup white chocolate chips optional, low-sugar or dairy-free for coating the balls if you want a sweeter finish.
Instructions
1-First Step: Mix the dry ingredientsAdd 1/4 cup protein powder, 1/4 cup coconut flour, and 2 tablespoons lemon zest to a medium bowl. Stir them together so the lemon zest spreads evenly through the mix. This helps every bite taste bright and balanced.
2-Second Step: Add the creamy ingredientsNext, add 1/4 cup cream cheese and 1.5 tablespoons lemon juice. Use a spoon, spatula, or clean hands to start combining the mixture. At first it may look a little crumbly, but that is normal.
3-Third Step: Knead until the dough comes togetherKnead the mixture gently until it forms a soft dough. If the mixture feels too soft or sticky, add a little more coconut flour. If it feels too thick, add a small amount of yogurt, or a tiny splash of water or honey if you prefer. The goal is a dough that can be rolled without falling apart.
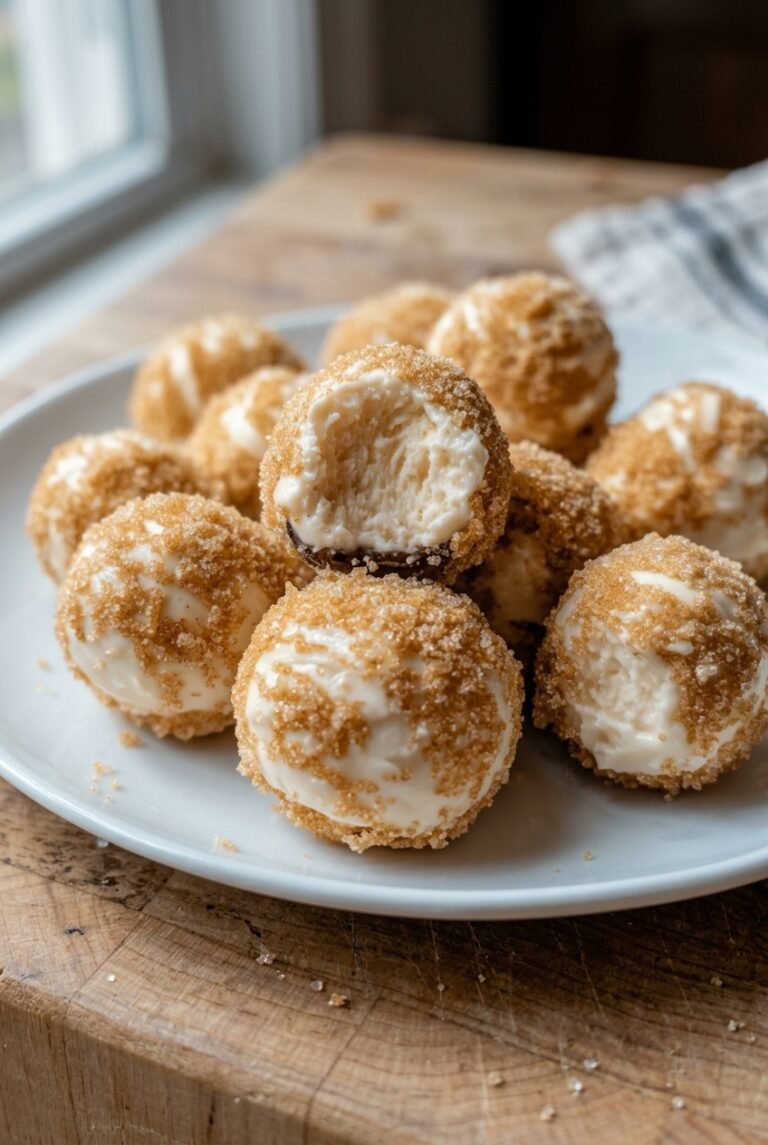
4-Fourth Step: Roll into bite-size ballsScoop the dough and roll it into tablespoon-sized balls. You should get about 7 protein balls from this batch, depending on size. If the dough sticks to your hands, lightly dampen your palms or chill the dough for a few minutes first.
5-Fifth Step: Add the optional white chocolate coatingIf you want a sweeter finish, melt 1/4 cup white chocolate chips and dip or drizzle the balls with the melted coating. You can use low-sugar or dairy-free chips if needed. While the coating is still soft, sprinkle on a little extra lemon zest for a pretty finish and a boost of citrus aroma.
6-Final Step: Chill until setPlace the cheesecake protein balls on a plate or tray and refrigerate for 15 minutes to set. Once chilled, they are ready to eat. The short chill time helps the texture firm up and makes the flavor even better.
Last Step:
Please leave a rating and comment letting us know how you liked this recipe! This helps our business to thrive and continue providing free, high-quality recipes for you.Notes
🍋 Fresh lemon zest maximizes bright, natural flavor.
🔄 Add chia seeds or nuts for extra nutrition and texture.
❄️ Freeze for up to 1 month; thaw in fridge before eating.
- Prep Time: 10 minutes
- Chill Time: 15 minutes
- Cook Time: 0 minutes
- Category: Snacks
- Method: No Bake
- Cuisine: American
- Diet: High Protein, Low Sugar, Low Carb, Vegetarian, Vegan Option
Nutrition
- Serving Size: 1 ball
- Calories: 82 calories
- Sugar: 1g
- Sodium: 50mg
- Fat: 4g
- Saturated Fat: 3g
- Unsaturated Fat: 1g
- Trans Fat: 0g
- Carbohydrates: 8g
- Fiber: 2g
- Protein: 4g
- Cholesterol: 13mg