Ingredients
– 8 tablespoons (1 stick) unsalted butter
– Cooking spray or unsalted butter for pan coating
– 1 cup granulated sugar
– 2 large eggs
– 1 teaspoon vanilla extract
– 1 1/2 cups all-purpose flour
– 1/2 teaspoon baking powder
– 1/4 teaspoon kosher salt
– 1/2 cup whole or 2% milk
– 2 pints ice cream
– 6 large egg whites
– 1/4 teaspoon cream of tartar
– 1 cup granulated sugar
Instructions
1-First Step: Get the cake and ice cream ready Start by allowing the butter to soften at room temperature and letting the egg whites reach room temperature too. Then preheat the oven to 350°F with the rack in the middle position. Coat a 9×13-inch baking pan with cooking spray or butter and line it with parchment paper. This setup helps the cake release cleanly later, which matters when you are cutting neat rounds for the minis. Next, scoop 8 portions of ice cream, about 2 1/4 inches wide or 1/3 cup each, onto a baking sheet. Freeze them until firm. This step is key because the ice cream needs to stay solid while you work with the cake and meringue.
2-Second Step: Make the cake batter Beat the butter and 1 cup sugar together until fluffy. Add the eggs and vanilla extract, then keep beating until the mixture looks light and well combined. In a separate bowl, whisk the flour, baking powder, and salt together. Add the dry ingredients to the butter mixture on low speed. Then gradually pour in the milk and mix until the batter looks smooth. The batter should be thick but easy to spread. If it seems too stiff, keep mixing gently rather than adding too much extra liquid.
3-Third Step: Bake and cool the cake Spread the batter evenly in the prepared pan and bake for 20 to 25 minutes. You are looking for a light golden top and a toothpick that comes out clean. Once baked, set the pan aside and let the cake cool completely. This part takes patience, but it matters because warm cake can melt the ice cream during assembly. When the cake is fully cool, remove it from the pan, discard the parchment, and cut out 8 rounds using a 3-inch cutter. Place the rounds on a foil-lined baking sheet. If you want extra neat edges, use a firm downward press instead of twisting the cutter.
4-Fourth Step: Whip the meringue For the meringue, whisk the egg whites and cream of tartar until they look foamy. Slowly add 1 cup sugar while continuing to beat. Keep going until the meringue becomes glossy and forms stiff peaks. The meringue should hold its shape when you lift the beater. This is where the dessert gets its signature look. A stable meringue is not just pretty, it also helps insulate the ice cream while it browns. That means your mini baked alaska can go under the broiler for a short time without turning into a puddle.
5-Fifth Step: Assemble the minis Place one cake round on the foil-lined baking sheet. Top it with one scoop of frozen ice cream. Then cover the ice cream completely with meringue, making sure there are no gaps. Build the meringue up into soft peaks for a classic finished look. An offset spatula works well here because it helps shape the sides and create those pretty waves and points. The secret to a good Baked Alaska is simple: keep everything cold until the very last minute, then brown the meringue quickly and serve right away.
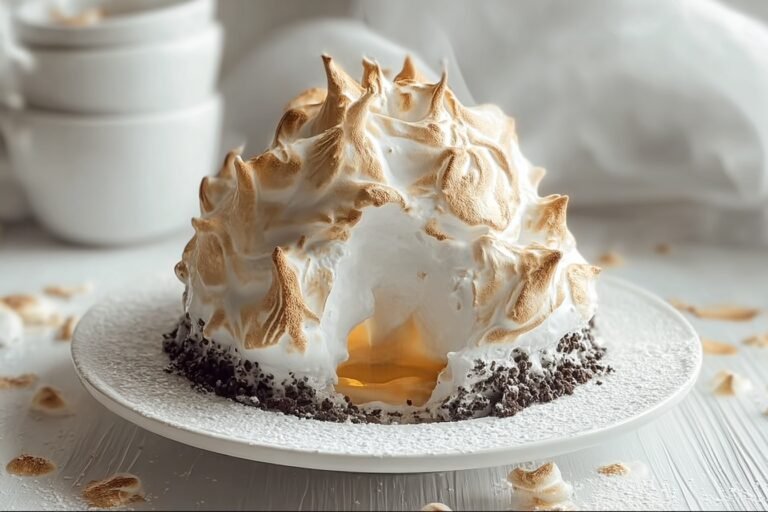
6-Final Step: Brown and serve Place the assembled minis under a broiler for 1 to 3 minutes, or use a kitchen torch until the meringue turns lightly golden. Watch closely the whole time because the color can change fast. Once the tops look toasted and beautiful, serve immediately. The finished dessert gives you a soft cake base, creamy frozen center, and warm toasted meringue on top. That hot-cold contrast is what makes homemade baked alaska such a memorable treat.
Last Step:
Please leave a rating and comment letting us know how you liked this recipe! This helps our business to thrive and continue providing free, high-quality recipes for you.Notes
📅 Bake/freeze cake ahead up to 1 month; thaw overnight for quick assembly.
🔥 Meringue seals ice cream – no melt during quick broil/torch browning.
🍦 Customize ice cream flavors per mini; chocolate, strawberry, or mix-ins shine!
- Prep Time: 35 minutes
- Ice Cream Freezing: 30 minutes
- Cook Time: 30 minutes
- Category: Dessert
- Method: Bake
- Cuisine: American
- Diet: Vegetarian
Nutrition
- Serving Size: 1 mini Alaska
- Calories: 580 kcal
- Sugar: 65 g
- Sodium: 205 mg
- Fat: 23 g
- Saturated Fat: 12.5 g
- Unsaturated Fat: 10.5 g
- Trans Fat: 0 g
- Carbohydrates: 85 g
- Fiber: 1 g
- Protein: 10 g
- Cholesterol: 100 mg